Welcome to the first start of Auto Print Order
Please find the basic steps to get started.
Set up Auto Print Order in 5 steps
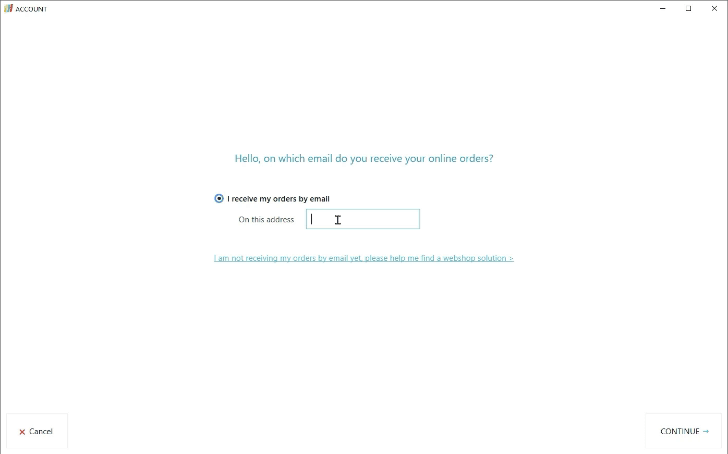
1. Add your email account
To print your documents, you must indicate which e-mail box receives your documents (orders, invoices, delivery notes, etc.). Please click on 'Connect your account'.

2. Settings for email account
Don't forget to click on the button 'Test connection' (or Sign in), this is important if your account is a Gmail or Office365.
By default it will process unread emails on the last 7 days you can change that.
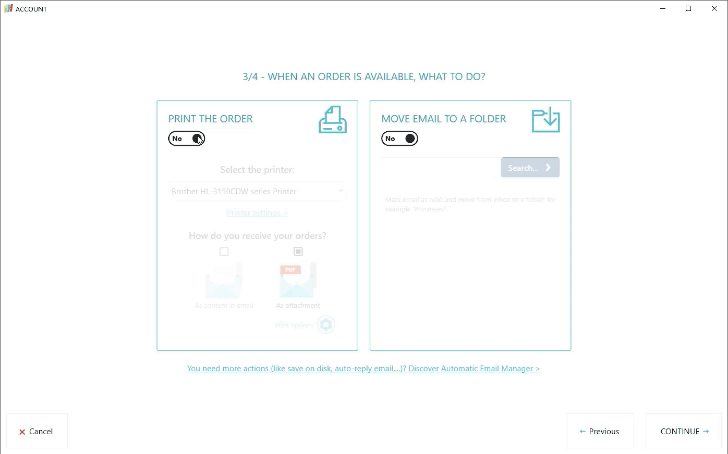
3. Select your printer
Choose the printer on which your emails will be printed. Then it is important to choose whether you need to print the body of the email (in general the orders) or the attachments (in general the invoices, delivery slips).
Optionally you can also activate the action to move the email to a folder after printing, like this you keep your inbox only with unprocessed items.
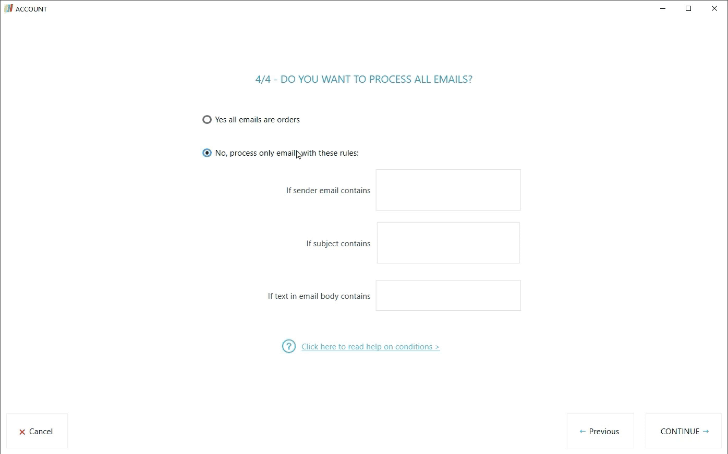
4. Target the emails
If you do not want to process all the emails that come in your inbox, define some rules as for example 'If the subject of the e-mail contains Order'.
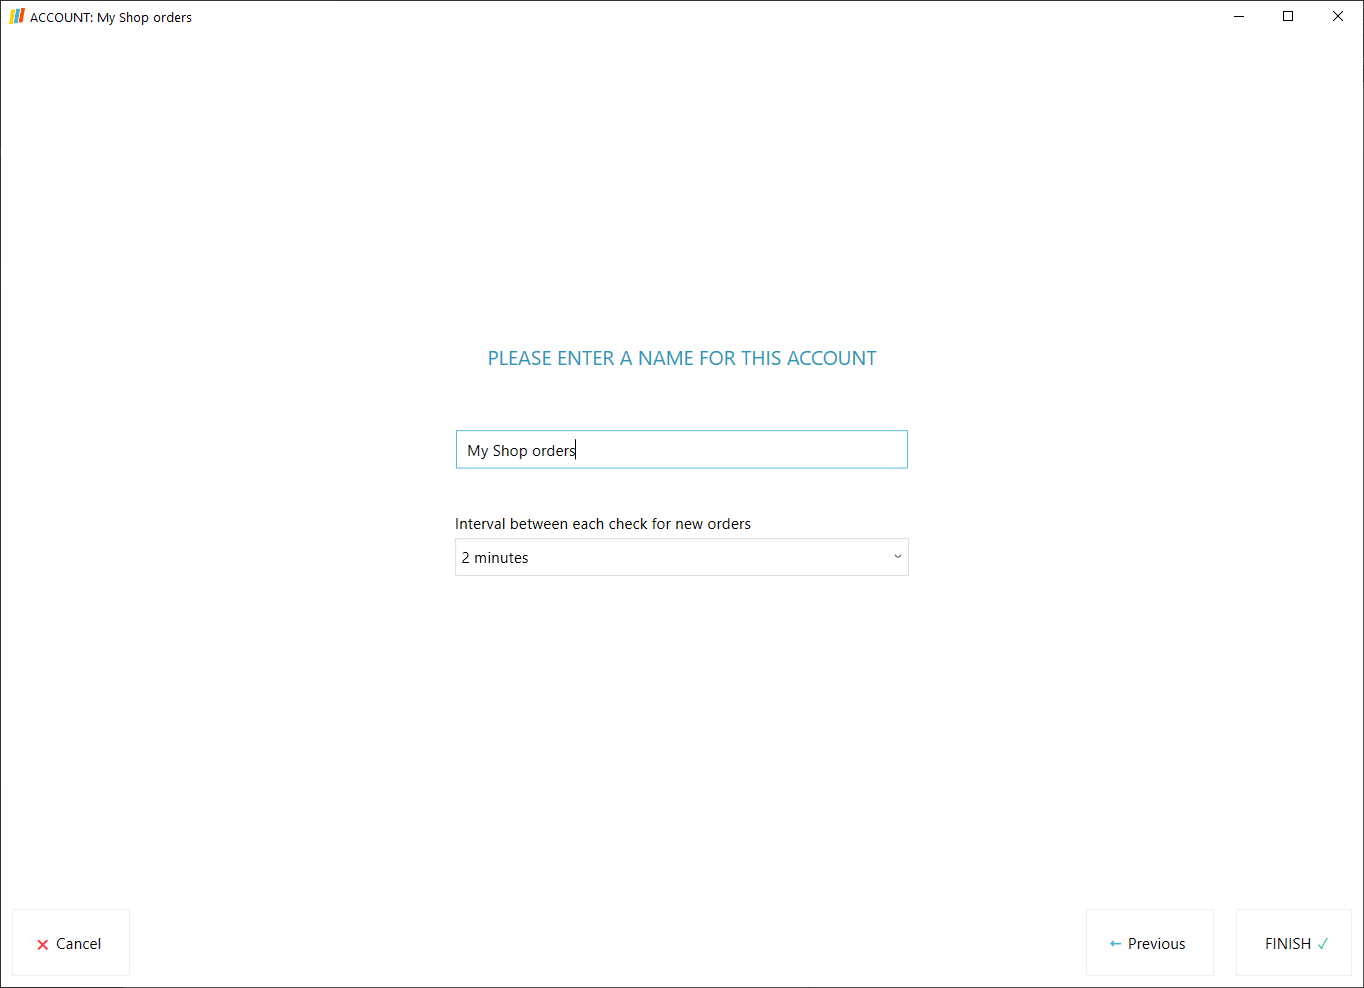
5. Set the checking interval
Give a name for this account, then select the time interval between each verification for new emails.
Tip of the day
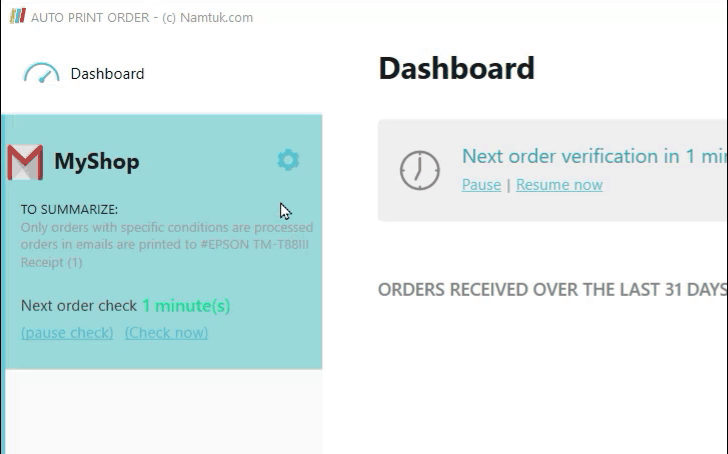
How to edit the account?
To edit, or delete, the account you just added, simply click on the gear to the right of the account name.